If you use multiple email addresses for different roles or departments like sales@yourcompany.com, support@yourcompany.com, or info@yourcompany.com, you don’t need separate mailboxes to manage them. With Microsoft 365, you can use email aliases (also known as proxy addresses) to receive and send mail from different addresses tied to a single mailbox.
This can be useful for small teams, individuals handling multiple responsibilities, or during domain transitions. In this guide, I’ll walk through how to enable sending from aliases in Microsoft 365 and how to use them in Outlook on the Web (OWA). I will also cover some quick troubleshooting steps if it’s not working as expected.
Enable Alias Sending in Microsoft 365 Via PowerShell
You can’t send an email via an alias unless you enable it in firsthand. And by default, Microsoft 365 doesn’t let users send email from aliases; it only receives messages to them. So, before anything else, this feature needs to be enabled by your admin.
You have two ways to do this: PowerShell or the Exchange Admin Center (EAC). If you’re comfortable with PowerShell (or if you’re the IT admin), here’s what to do. To note: Only global admins can run these commands. If you don’t have this permission, ask your Microsoft 365 administrator to perform the change.
Use the below script to enable alias for your Exchange Online.
Connect-ExchangeOnline
Set-OrganizationConfig -SendFromAliasEnabled $True
This enables sending from alias addresses across your organization. If you are unsure whether it got enabled or not, check the current status with the You should see: SendFromAliasEnabled = True
Get-OrganizationConfig | Format-Table SendFromAliasEnabled
How to Add an Alias Email to a User Account in Microsoft 365
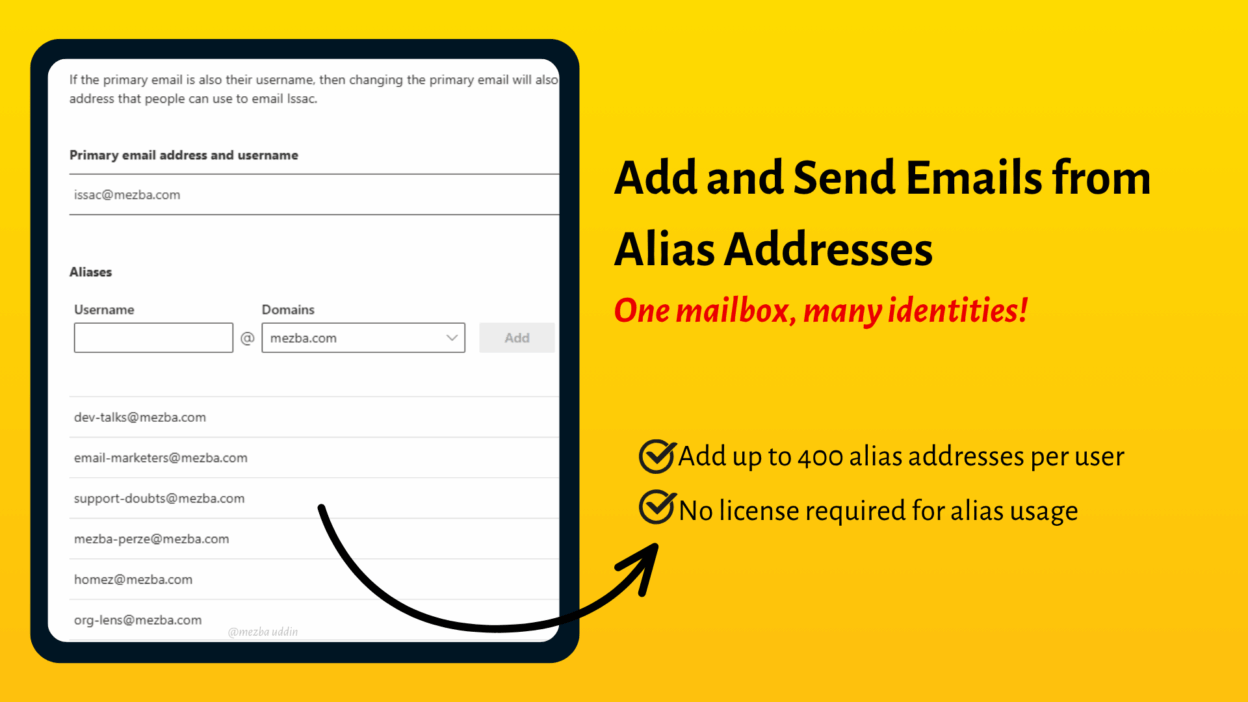
Now that the alias address has been enabled, you can add additional addresses called email aliases for any users. They allow users to receive messages sent to multiple email addresses, all routed to a single inbox!
A user can have up to 400 aliases, and there are no extra costs or licenses required for setting them up. This feature is available to Microsoft 365 administrators with business subscriptions. It’s not intended for home or personal use.
Firstly, adding an email alias can only be done from the Microsoft 365 admin center. If you’re not an admin, you’ll need to reach out to your IT team or Microsoft 365 administrator for assistance. Here’s how an admin can add an alias to a user’s mailbox:
- Go to the Microsoft 365 Admin Center
- Navigate to Users > Active users
- Click the user you want to assign an alias to
- Under the Account tab, select Manage username and email
- In the pop-up window:
- Under the Aliases section, click + Add an alias
- Enter the new alias (e.g., support@yourcompany.com)
- Select the appropriate domain from your list of owned domains.
9. Click Add, then Save changes
✅ The alias will now be associated with the user’s mailbox. They can receive emails sent to that address immediately. To send emails from this alias, make sure the “SendFromAlias” feature is enabled (covered in a previous section).
Insight for Brain: If multiple people need to access or manage messages sent to a common address like info@contoso.com or sales@contoso.com, it’s better to set up a shared mailbox, instead of using alias emails. This allows multiple users to read and reply to emails from a single, shared address.
Select aliases in Outlook for Web
Once the backend setting is enabled and the alias has been added, each user can view their alias addresses available and opt in to allow sending from the alias:
- Sign in to Outlook on the web and click the gear icon in the top‑right corner.
- In the side pane, click View all Outlook settings.
- Go to Mail > Compose and reply.
- Scroll to Addresses to send from. A list of the mailbox’s primary and alias addresses appears. Check the box next to each alias you want available in the From dropdown and click Save.
The screenshot below shows the Compose and reply settings page. Here you can see how the “Addresses to send from” section lists multiple addresses with checkboxes and a red Save button at the bottom:
Send Email from Alias in Outlook on the Web
As we have made everything ready now, users can start sending from their alias email addresses. Here’s how to do it in OWA (Outlook on the Web):
- Open Outlook on the Web and click New mail
- Click Options in the menu and check Show From
- In the new message window, click the From drop-down, select the alias you want to send mail from.
4. If your alias isn’t listed:
5. Click Other email address
6. Type your alias (e.g., sales@yourcompany.com)
7. Compose your email as usual
8. Make sure the From field shows your alias address
9. Click Send
Good to go! To be sure, open the email in your Sent Items folder and check that the From field shows the alias you intended to use.
Troubleshooting: Can’t Send from Alias?
Everything might not work as expected, sometimes! So, if things aren’t working, here are a few fixes to try:
Send As Alias Not Working: Make sure SendFromAliasEnabled is truly active using the cmdlet I have provided above. If it says False, you (or your admin) need to enable it again, and it would work.
Alias Not Showing in “From” Dropdown: Confirm the global setting is enabled, the alias exists on the account and that you checked the box in Addresses to send from. If the alias still doesn’t appear, sign out and back in or clear your browser cache.
Permission errors: If you see a message saying you don’t have permission to send from the address, it usually means the organisation hasn’t enabled the feature or the alias isn’t assigned to your mailbox. Re-enable or recheck whether alias is available or not.
Delayed availability: After enabling the organisation setting or adding a new alias, it can take up to 24 hours for the change to propagate across Exchange Online.
Export Alias Report List for Users
If you manage many users and want to quickly view or share a list of all aliases across your Microsoft 365 tenant, consider using PowerShell to export them.
Get-Mailbox -ResultSize Unlimited | Select-Object DisplayName, UserPrincipalName, @{Name="Aliases";Expression={
    ($_.EmailAddresses | Where-Object { $_ -like "smtp:*" }) -join "; "
}} | Export-Csv -Path "AliasAddresses.csv" -NoTypeInformation
This can help admins identify available proxy addresses for each mailbox. Sending emails from an alias address in Microsoft Outlook is a huge convenience and gives you control over how you present yourself in different scenarios. Whether you’re managing multiple domains, departments, or identities, this feature keeps things neat and professional.
Once enabled by your admin, all it takes is a quick switch in the “From” field and you’re ready to go. If you have any questions about aliases or Microsoft 365 email setups, drop them in the comments or share your use case. I’d love to help or hear how you’re using aliases in your workflow!


