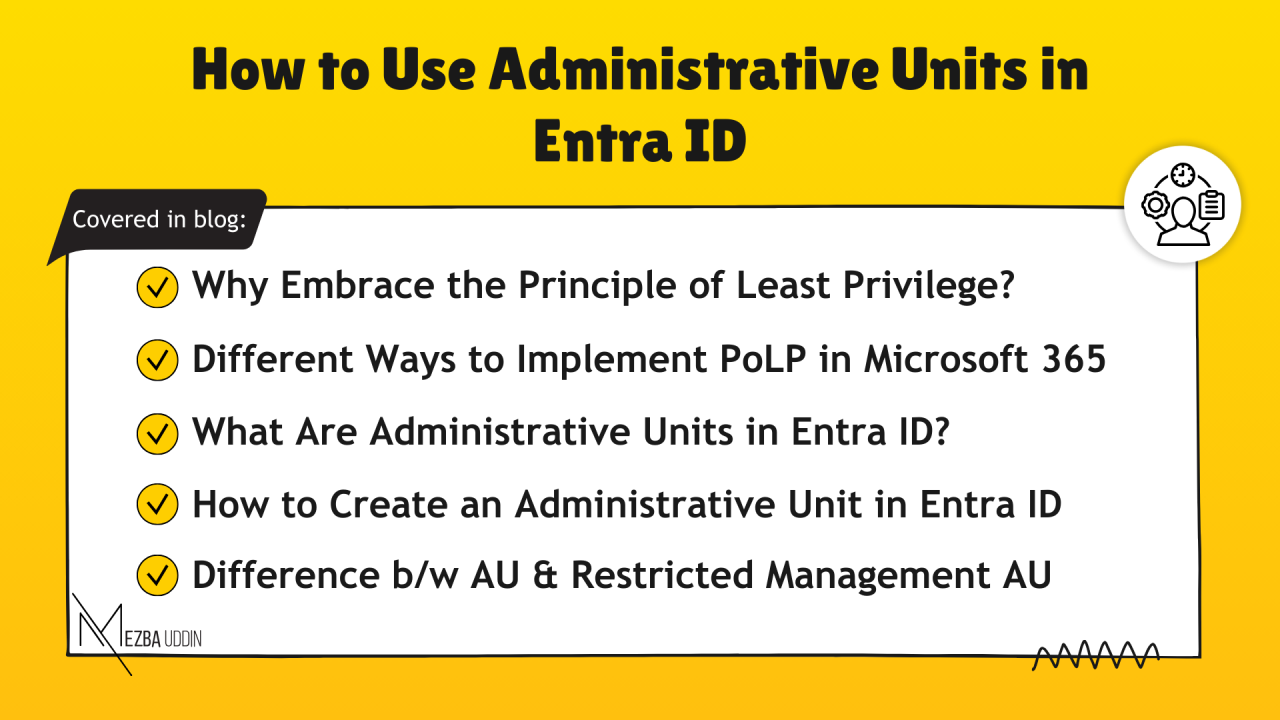
Not all admin tasks can land on one person’s plate—I’ve been there at the start of my career, handling it all. Lesson learned: delegation is key. But let’s be real, delegating admin roles can feel like walking a tightrope.
On one hand, you need to ensure your organization is secure, but on the other, you’re trying not to hand out high privileges. So, in such situations, we must ensure that the Principle of Least Privilege is implemented!
So, what exactly is PoLP, and how do we nail it in Microsoft 365? Let’s break it down together—especially a hidden gem in Entra ID (formerly Azure AD): Administrative Units (AUs). You’ll thank me later for this one!
Why Should You Embrace the Princip
Why Should You Embrace the Principle of Least Privilege?
Imagine giving every employee in your company the keys to every office, every vault, and every room. Sounds reckless, right? That’s exactly what happens when Microsoft 365 users or admins have more access than they need.
So, that’s where you implement PoLP. The Principle of Least Privilege is all about giving people just enough access to do their job—nothing more, nothing less! This simple idea drastically reduces your Microsoft 365 attack surface and prevents accidental misconfigurations.
But here’s the big question: how do you enforce PoLP in a complex Microsoft 365 setup? Let’s dig in!
Different Ways to Implement PoLP in Microsoft 365
Microsoft 365 comes loaded with tools to implement PoLP seamlessly. Here are some highlights:
- Role-Based Access Control (RBAC): Assign roles with specific permissions tailored to job functions.
- Privileged Identity Management (PIM): Grant time-bound, just-in-time access to critical roles.
- Conditional Access Policies: Restrict access based on user location, device status, or app sensitivity.
- Administrative Units: This is our star feature(hero) in this blog, AUs segment your directory into manageable chunks.
Quite confusing, right? Nothing to worry, in the next section, I’ll spotlight Administrative Units and how they bring pinpoint control to Entra ID, and help you enforce PoLP with precision too!
What Are Administrative Units in Entra ID?
To be simpler – Administrative Units are virtual containers within your directory. They allow you to delegate admin responsibilities for specific users, groups, or resources without granting organization-wide permissions. AUs help you:
- Organize resources logically (e.g., by department, region, etc).
- Assign admin tasks to specific teams without giving them access to the whole org.
- Enable decentralized management without compromising security.
Here are two practical examples that explain administrative units better:
- You’ve got a Help Desk Administrator role. Without PoLP, they could manage help desk tasks for every user in your org. But with AUs, you can scope this role to a specific group—say, the “Marketing Team AU.” Now, that admin can only manage users in Marketing, not Legal or IT.
- Or imagine you’re running an international business with offices in New York, London, and Tokyo. Each office has its own admin team, but you don’t want New York snooping into London’s user data. With AUs, you can lock them into their respective regions. That’s how AUs in Entra ID work!
License Requirements for Administrative Units in Entra ID
Global Admin and Privileged Role Admin can create Administrative Units in the Microsoft Entra admin center without any license requirements.
- Admins managing AUs: Need an Entra ID P1 license for each admin with directory roles over an AU.
- AU members: Need a Free license for each member in the AU.
- Dynamic membership: If using dynamic membership rules, each AU member needs an Entra ID P1 license.
How to Create an Administrative Unit in Entra ID
Let’s turn theory into action with a real-world example! Here’s how:
- Open Microsoft Entra admin center.
- Head to the ‘Roles & Admins’ drop-down and select ‘Admin Units.’
- Click ‘Add’ to create a new Administrative Unit (AU).
- Fill in the name and description, and if needed, toggle on ‘Restricted Management Administrative Unit’ (more on this later).

5. In the ‘Assign roles’ section, choose the admin role for this AU. For example, I assigned Isaac as the Helpdesk Admin for the Marketing department.
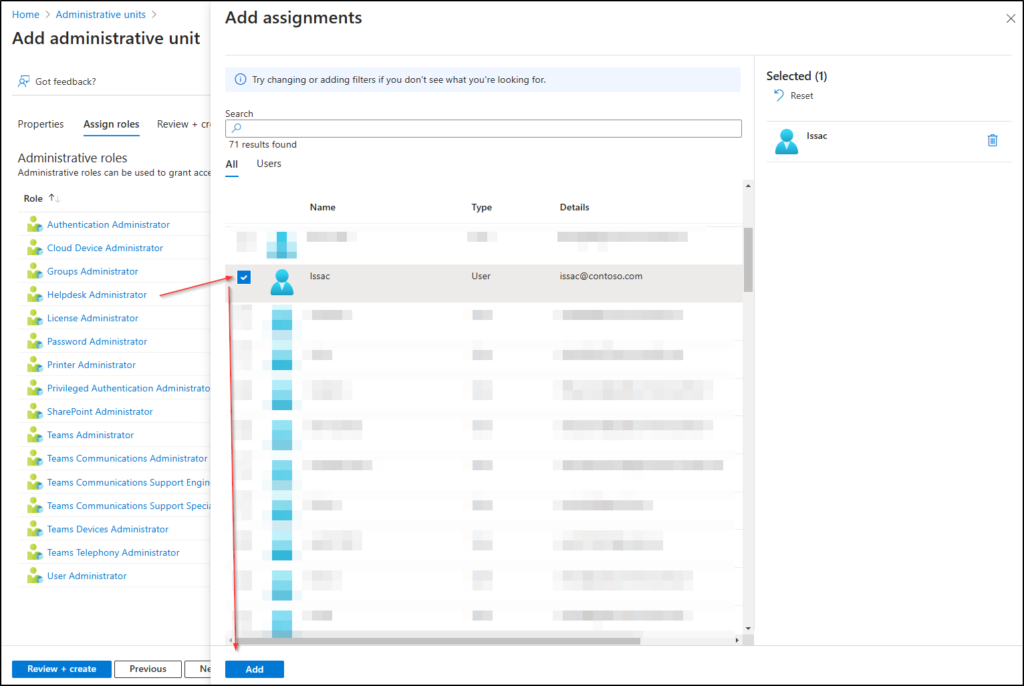
6. Hit ‘Review and Create’ to finalize your new AU.
Once you click ‘Create,’ you’ll land on the Administrative Units homepage—time for the next step!
Add Users to an Administrative Unit in Entra ID
With your AU set up and the admin role assigned, it’s time to decide whom they’ll manage. Here’s how:
- Select the AU you just created.
- Plan whether the admin will manage users, groups, or devices, and choose the corresponding tab on the left-hand side.
- Assign the users, groups, or devices you want. For example, I created a new group called ‘Marketers’ and added the relevant members.

4. Now, Isaac can manage Marketing members but won’t have access to HR or any other department – despite being a Helpdesk Admin. That’s the beauty of AUs: focused control with no spillover!
Real-Time Experience
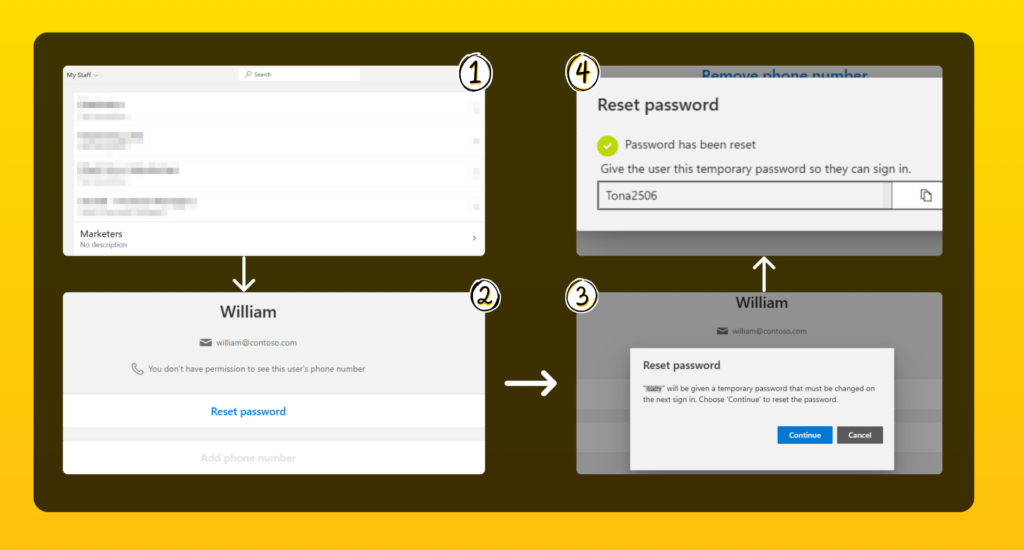
Let’s see how Isaac, as a Helpdesk Admin, can reset the passwords of users delegated to him. This action is done through the ‘My Staff’ portal.
A Quick Note on Access:
Only users with an assigned admin role can access the My Staff portal. If you enable My Staff for someone without an admin role, they won’t be able to access the portal.
What Happens in the My Staff Portal?
When a delegated admin accesses the My Staff portal, they’ll see the names of the Administrative Units (AUs) where they have permissions.
- If the admin’s permissions are scoped to an AU, they’ll only see users within that unit.
- If no AU scope exists, their permissions apply across the organization.
Admins with access can log in at https://mystaff.microsoft.com. From there, they:
- Select an Administrative Unit to see its users.
- Pick a user from the list to open their profile.
- Reset the user’s password directly from the profile page.
Difference Between Administrative Units and Restricted Management Administrative Units
When creating an Administrative Unit, you might notice a toggle for ‘Restricted Management Administrative Unit’ – but should you turn it on? Here’s what you need to know:
Administrative Units:
- Purpose: Used for logical segmentation and role delegation. Delegated admins can only manage resources within their AU.
- Global Admins: They can still manage all resources, even if they aren’t assigned specific roles at the AU level.
Restricted Management Administrative Units:
- Purpose: A more restrictive version of AUs. Only users with assigned roles at the unit level can manage it.
- Global Admins: A stricter variant where even global administrators’ permissions are scoped down to the AU.
So, the big difference? Restricted Management is a stricter approach that tightens control- even for Global Admins. Choose this if you need more fine-grained access control.
Conclusion: My Take on Administrative Units
Honestly, Administrative Units are one of those features that make me think, “Thank goodness this exists!” They’re straightforward but pack a punch when it comes to delegating tasks without losing control. Once you start using them, you’ll wonder how you managed without them.
If you’re still on the fence, just give it a try with a small group or department. You’ll see how much control and peace of mind they bring. Got any cool AU tips or stories? Drop them in the comments – I’d love to hear how you’re using them!

